Have you ever wondered what more we can achieve with WordPress beyond its standard customization options for any website? With the Laravel WordPress package, this is now possible by connect WordPress with Laravel. This package enables you to integrate WordPress functionality into Laravel, allowing you to push the boundaries of customization. You no longer need to rely solely on plugins for added features and customizations—you can create your own tailored solutions.
WordPress, the world’s most popular content management system, powers over 40% of websites and excels in managing content. On the other hand, Laravel offers a robust framework for building complex web applications. By combining the strengths of both platforms, you can harness WordPress’s content management capabilities alongside Laravel’s development power.
This integration is made seamless with the Corcel package, which enables Laravel applications to interact directly with WordPress databases, providing a flexible and innovative development experience.

Table of Contents
Prerequisites
Before starting, ensure you have:
- PHP 8.0 or higher
- Composer installed
- A working WordPress installation with its database
- Basic knowledge of Laravel and WordPress
Project Setup of WordPress With Laravel
1. Creating a New Laravel Project
First, create a new Laravel project using Composer:
composer create-project laravel/laravel wordpress-laravel
cd wordpress-laravel
2. Installing Required Packages
Install Corcel and Laravel UI:
composer require jgrossi/corcel
composer require laravel/ui
Generate the authentication scaffold with Bootstrap:
php artisan ui bootstrap --auth
npm install && npm run dev
After all the installation run laravel project by running this command it will look like this:
php artisan serve
3. Publishing Corcel Configuration
Publish the Corcel configuration file:
php artisan vendor:publish --provider="Corcel\Laravel\CorcelServiceProvider"Configuration For Connect WordPress With Laravel
1. Database Configuration
Add the WordPress database configuration in config/database.php:
'wordpress' => [
    'driver' => 'mysql',
    'host' => env('DB_HOST', '127.0.0.1'),
    'port' => env('DB_PORT', '3306'),
    'database' => 'your_wordpress_database',
    'username' => 'database_username',
    'password' => 'databse_password',
    'unix_socket' => env('DB_SOCKET', ''),
    'charset' => env('DB_CHARSET', 'utf8'),
    'collation' => env('DB_COLLATION', 'utf8_unicode_ci'),
    'prefix' => 'wp_',
    'strict' => false,
    'engine' => null,
]
2. Corcel Configuration
Update config/corcel.php to use the WordPress connection:
'connection' => 'wordpress'User Authentication Integration
1. Modify User Model
Update app/Models/User.php to extend Corcel’s User model for the authentication:
<?php

namespace App\Models;

use Illuminate\Database\Eloquent\Factories\HasFactory;
use Illuminate\Notifications\Notifiable;
use Corcel\Model\User as Corcel;

class User extends Corcel
{
    use HasFactory, Notifiable;

    protected $fillable = [
        'name',
        'email',
        'password',
    ];

    protected $hidden = [
        'password',
        'remember_token',
    ];

    protected function casts(): array
    {
        return [
            'email_verified_at' => 'datetime',
            'password' => 'hashed',
        ];
    }
}
2. Configure Authentication
Update config/auth.php to use Corcel’s authentication driver:
'providers' => [
    'users' => [
        'driver' => 'corcel',
        'model' => env('AUTH_MODEL', App\Models\User::class),
    ],
]
From this all the changes for the authentication have been done now we can log in through the WordPress user in the laravel project.
Login in laravel with WordPress user
1. Create a user in the WordPress project:

2. Now login with that user in laravel:


3. Login will be successful with these credentials:

We have connected the authentication system in both projects so with that WordPress user we can log in to the laravel with project. Now WordPress with Laravel connected successfully and we can use seamlessly.
Now we will work on a simple blog module to show all our blogs in laravel.
Building the Blog Module
1. Create PostController
Generate a new controller:
php artisan make:controller PostControllerImplement the controller with index and show methods:
<?php

namespace App\Http\Controllers;

use Corcel\Model\Post;
use Illuminate\Http\Request;

class PostController extends Controller
{
    public function index()
    {
        $posts = Post::status('publish')
            ->where('post_type', 'post')
            ->get();

        $posts->each(function ($post) {
            $thumbnailId = $post->meta->_thumbnail_id;
            $thumbnail = $thumbnailId ? Post::find($thumbnailId) : null;
            $post->thumbnail_url = $thumbnail ? $thumbnail->guid : null;
        });

        return view('posts.index', compact('posts'));
    }

    public function show($slug)
    {
        $post = Post::where('post_type', 'post')
            ->where('post_name', $slug)
            ->firstOrFail();

        $thumbnailId = $post->meta->_thumbnail_id;
        $thumbnail = $thumbnailId ? Post::find($thumbnailId) : null;
        $post->thumbnail_url = $thumbnail ? $thumbnail->guid : null;

        return view('posts.show', compact('post'));
    }
}
2. Define Routes
Add these routes to routes/web.php:
use App\Http\Controllers\PostController;

Route::get('/', [PostController::class, 'index'])->name('posts.index');
Route::get('/post/{slug}', [PostController::class, 'show'])->name('posts.show');
3. Create Views
Create the following view files:
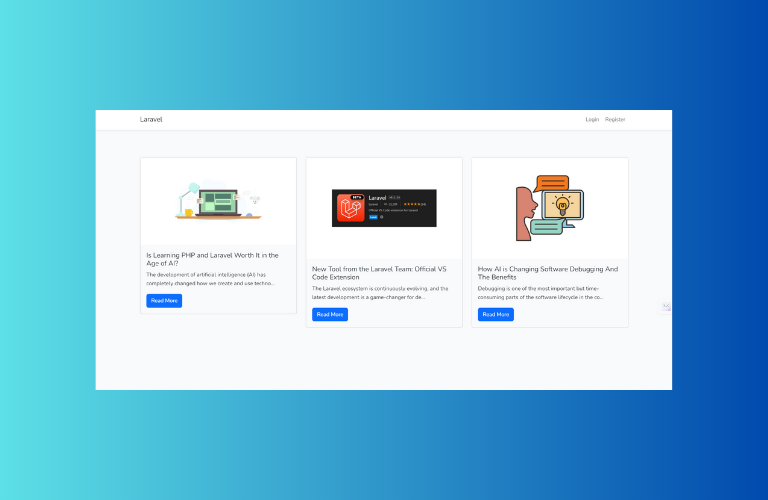
resources/views/posts/index.blade.php:
@extends('layouts.app')

@section('content')
<div class="container my-5">
    <div class="row">
        @foreach ($posts as $post)
        <div class="col-md-4 mb-4">
            <div class="card">
                @if ($post->thumbnail_url)
                    <img src="{{ $post->thumbnail_url }}" class="card-img-top" alt="{{ $post->post_title }}">
                @endif
                <div class="card-body">
                    <h5 class="card-title">{{ $post->post_title }}</h5>
                    <p class="card-text">
                        {{ \Illuminate\Support\Str::limit(strip_tags($post->post_content), 100) }}
                    </p>
                    <a href="{{ route('posts.show', $post->post_name) }}" class="btn btn-primary">
                        Read More
                    </a>
                </div>
            </div>
        </div>
        @endforeach
    </div>
</div>
@endsection
resources/views/posts/show.blade.php:
@extends('layouts.app')

@section('content')
<div class="container my-5">
    <div class="row">
        <div class="col-md-8 mx-auto">
            <h1 class="mb-4">{{ $post->post_title }}</h1>
            @if ($post->thumbnail_url)
                <img src="{{ $post->thumbnail_url }}" class="img-fluid mb-4"
                    alt="{{ $post->post_title }}">
            @endif
            <div class="post-content">
                {!! $post->post_content !!}
            </div>
            <a href="{{ route('posts.index') }}" class="btn btn-secondary mt-4">
                Back to Posts
            </a>
        </div>
    </div>
</div>
@endsection
Features and Benefits
- Seamless Authentication: Users can log in to the Laravel application using their WordPress credentials.
- Content Synchronization: All posts, pages, and media from WordPress are instantly available in Laravel.
- Familiar Interface: WordPress remains the content management interface while Laravel handles the application logic.
- Performance: Corcel provides efficient database queries and caching mechanisms.
- Flexibility: You can extend WordPress functionality while leveraging Laravel’s robust features.
Advanced Features
1. Shortcodes
Register shortcodes in config/corcel.php:
'shortcodes' => [
    'gallery' => App\Shortcodes\GalleryShortcode::class,
    'video' => App\Shortcodes\VideoShortcode::class,
],
Create shortcode class:
class GalleryShortcode implements \Corcel\Shortcode
{
    public function render(ShortcodeInterface $shortcode)
    {
        return view('shortcodes.gallery', [
            'id' => $shortcode->getParameter('id')
        ])->render();
    }
}
2. Advanced Custom Fields (ACF) Integration
Install ACF support:
composer require corcel/acfUsage:
$post = Post::find(1);
echo $post->acf->field_name;
echo $post->acf->text('text_field');
3. Menu Management
$menu = Menu::slug('primary')->first();

foreach ($menu->items as $item) {
    if ($item->instance() instanceof Post) {
        echo $item->instance()->title;
    } elseif ($item->instance() instanceof Term) {
        echo $item->instance()->name;
    }
}
Conclusion
This integration demonstrates the power of combining WordPress’s content management capabilities with Laravel’s application framework. By using Corcel, we’ve created a bridge between these two powerful platforms, allowing developers to leverage the best of both worlds while maintaining clean, maintainable code.
Remember to keep both WordPress and Laravel updated to their latest versions and regularly check for Corcel updates to ensure security and compatibility.


